Open Cloud Software
Open Cloud is
- an open source software
- letting you intereact with your trusted partners
- over a secure plateform.
It helps you to share
- data
- compute
- storage
- and algorithmic services.
USER BENEFITS
- One API for all your processing and data needs
- One accounting system wherever you process
- Build your own private datacenter in a few clicks
- Share, rent, sell data and resources you wish, only to the partners you wish
- Security, privacy and full control over your data location
- Full open source customizable environment
- Complete documentation, online tools and suite
Getting started
- In order to install OneCloud all you need is to :
- Create your Kubernetes cluster and connect to it
- checkout https://gitlab.com/o-cloud/helm-charts.git into your local directory
- run install.sh
With these three simple steps you have installed the OneCloud solution in your cluster. To access the administration website you should launch the command line :
-
kubectl get all | grep LoadBalancer
-
the result :
[service/irtsb-traefik LoadBalancer XX.24.14.172 XX.132.59.174 4001....]
Where the first IP Adress is the internal IP, and the second is the external IP letting you to access your website.
In your internet browser, access to : XX.132.59.174/admin
it would let you configure OpenCloud solution.
-
create your identity : Your identity would let other partners to know your existence letting them to interact with you. Without an identity you wont be able to connect to other partners inside your network.
In your administration interface, click on Networks. Inside ‘Identity’ panel, click on ‘Create the identity’. Choose public network. Put a name, put the IP adresse inside ULR and choose one of five ports.
Click on ‘create’. Your identity is saved.
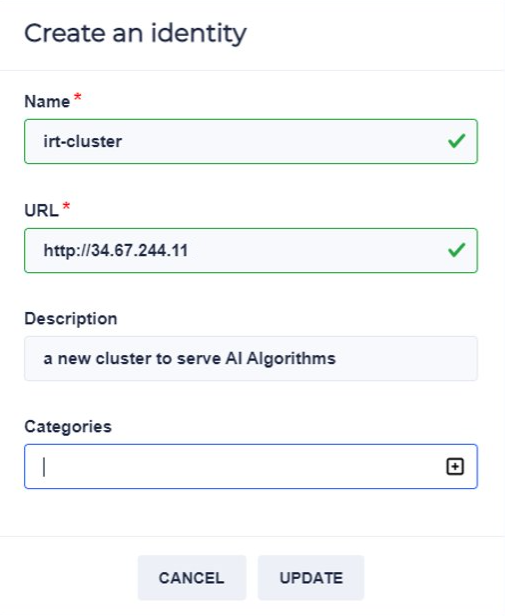
-
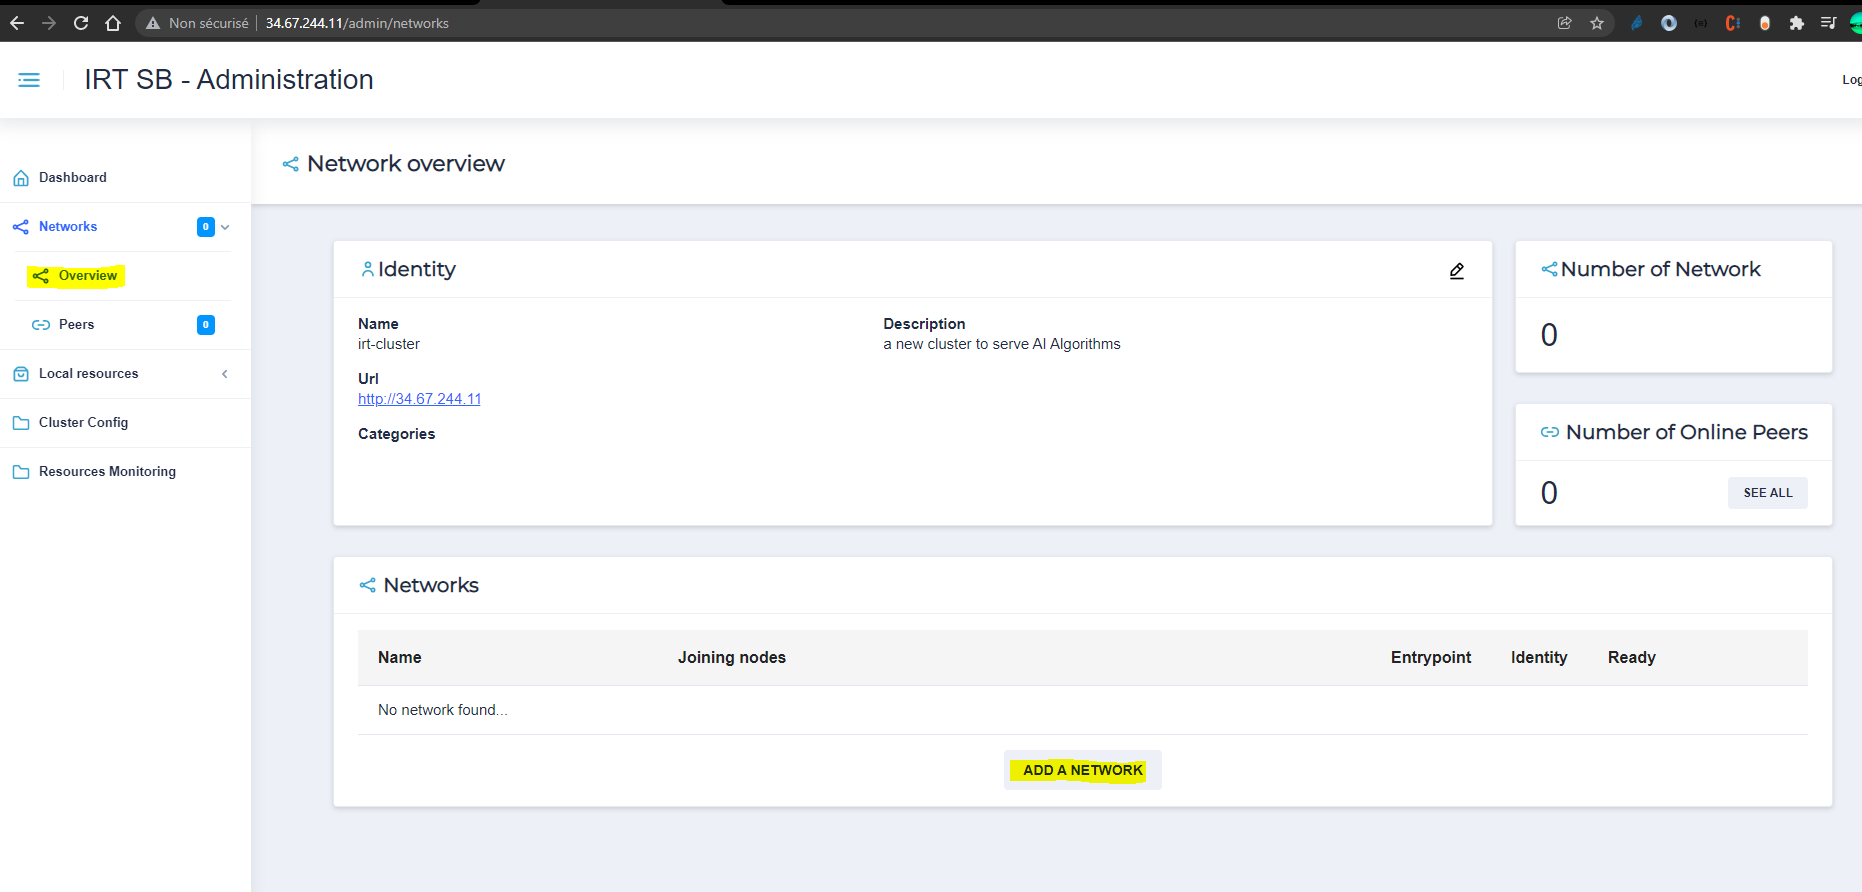
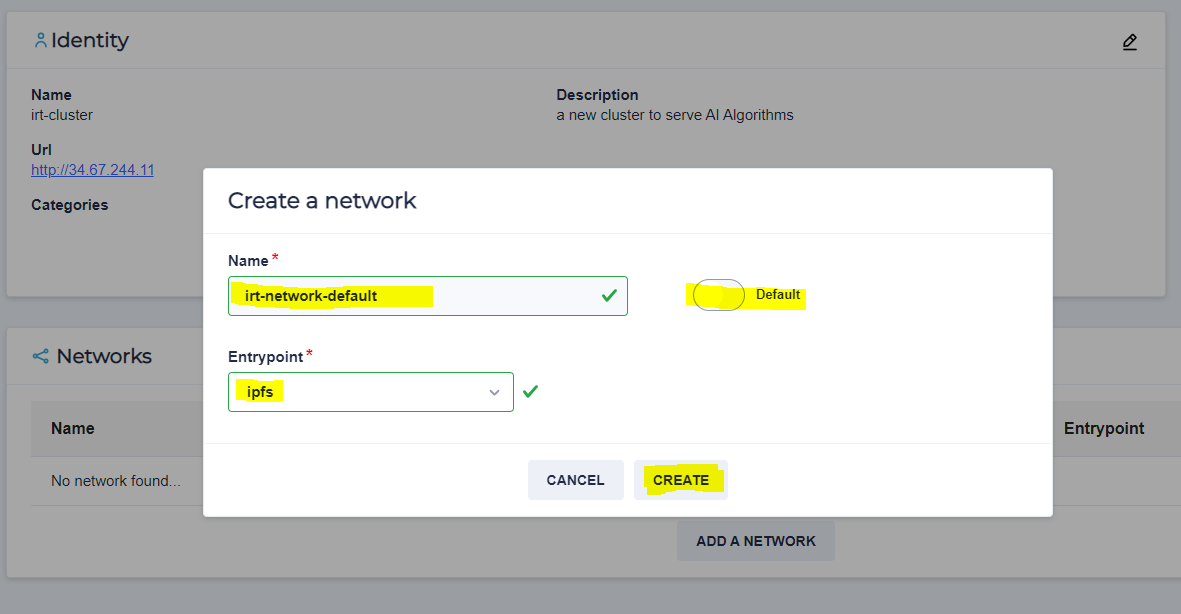
create your network In order to communicate with other partners you need to create a network or join an existing network. There are two types of networks :
- private : You can create your own private network. You can then gave your identity to others letting them to join your network. You can also join private networks of your partners by putting in their private key.
In order to create your network :
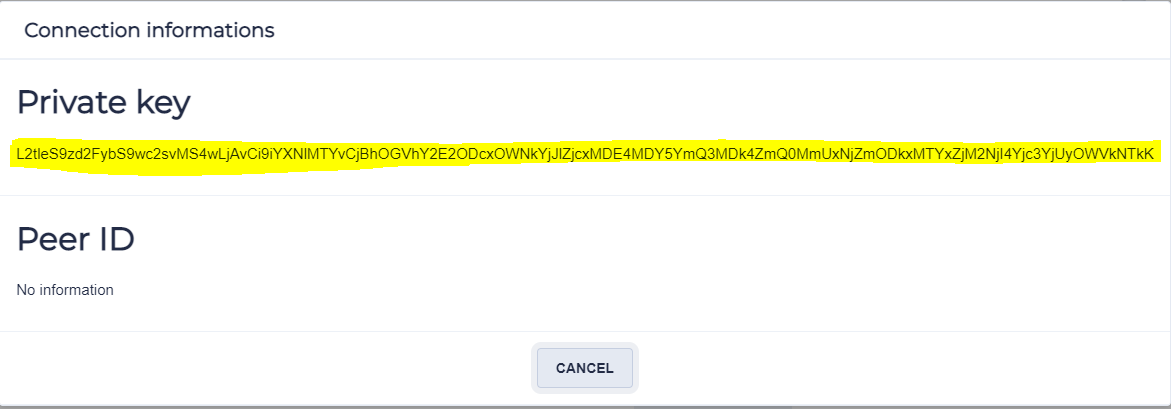
Once your network created, if its a private network and want to share it with others letting them to join your network, you can share this key for them.
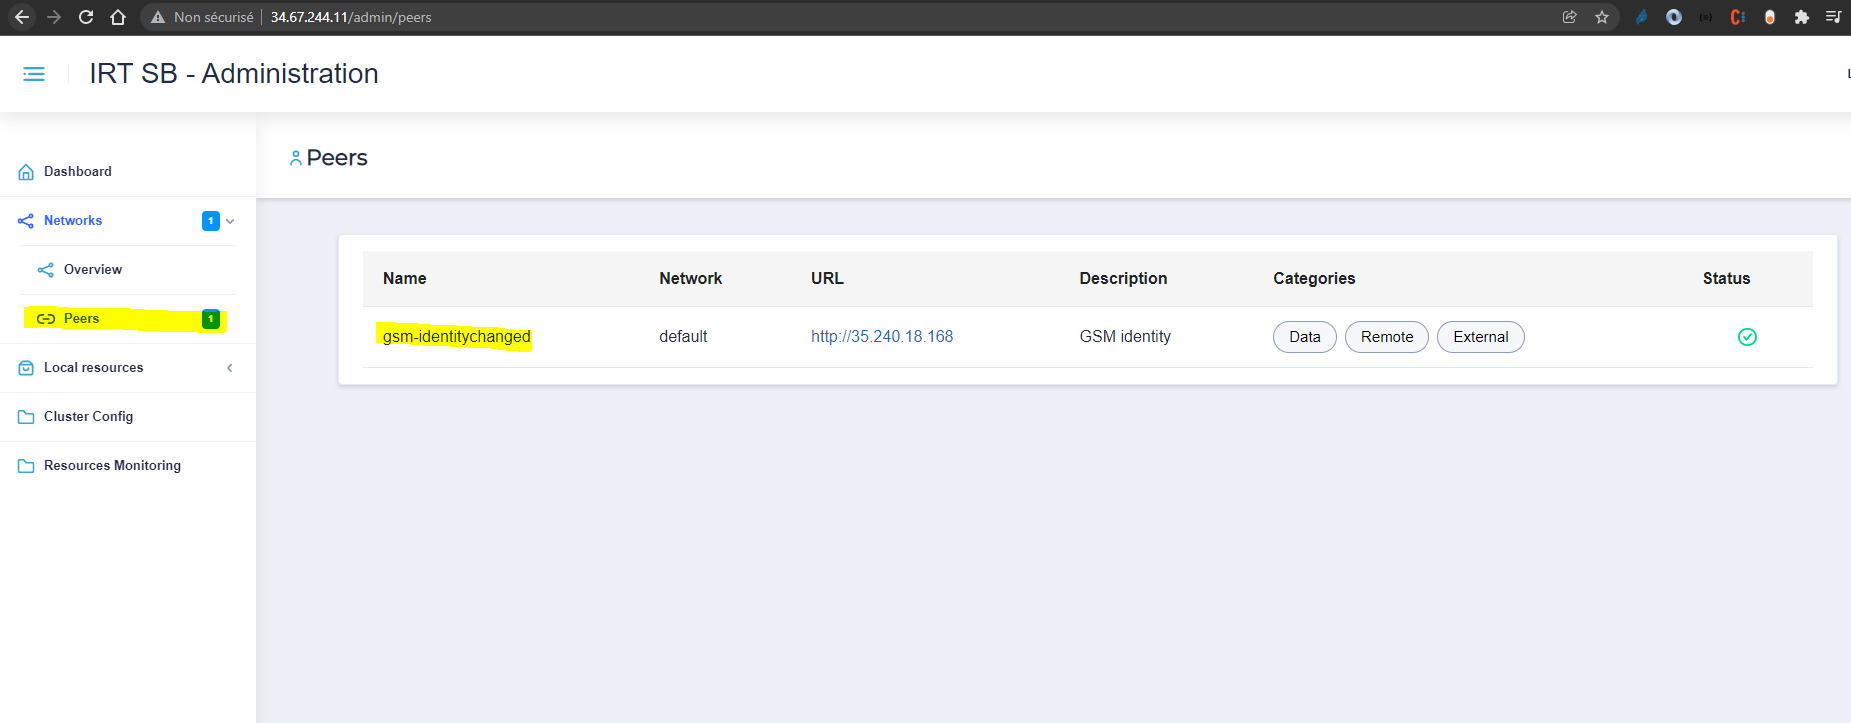
Once you have created your identity and your network (or joined the default network), all the instances available on the network would show off on the peers screen :
Functional documentation
Once you have configured your cluster via the admin interface, now you can use the standard interface letting you configure and launch your workflows.
Dashboard You can acceed to the following interface. In your internet browser, access to : XX.132.59.174
You can now see your standard interface.
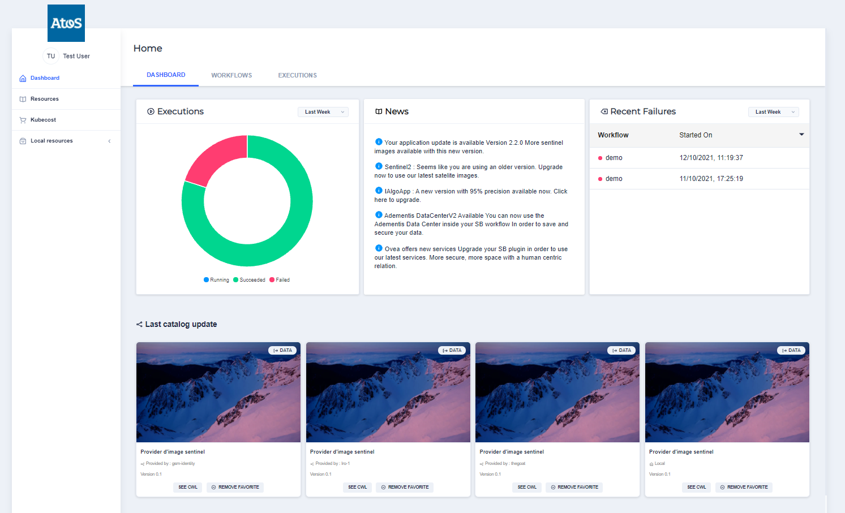
Resources On the left menu, click on Resources link. You can see the Catalog and Favorites panels.
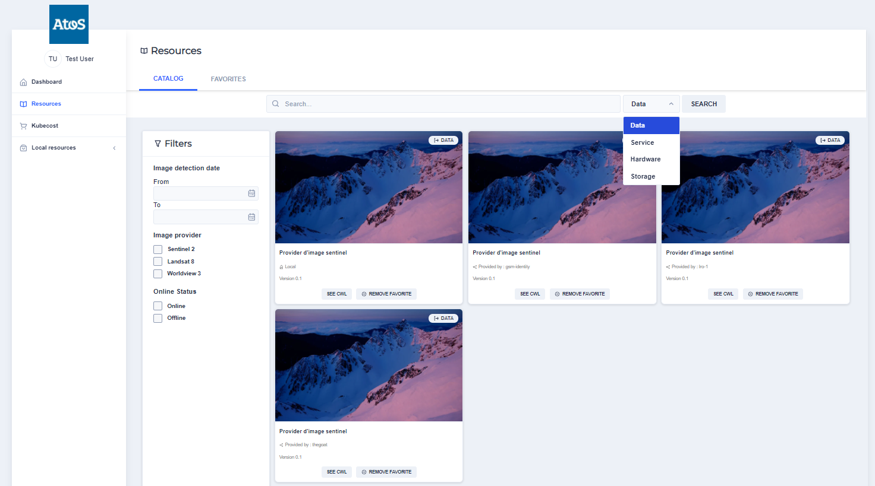
In you have been linked to partner clusters during the network creation process, you should be able to see your partner cluster’s resources.
You can add the needed resources for your workflow process creation by clicking on the button : ‘ADD FAVORITE’ on the resource segment.
Add as many as resources you need to construct your workflow.
In my example, I will add four resources :
- Sentinel Image Provider
- Compute provider
- a storage provider (MINIO Push to S3)
- image conversion algorithm process provider(GDAL Convert Image)
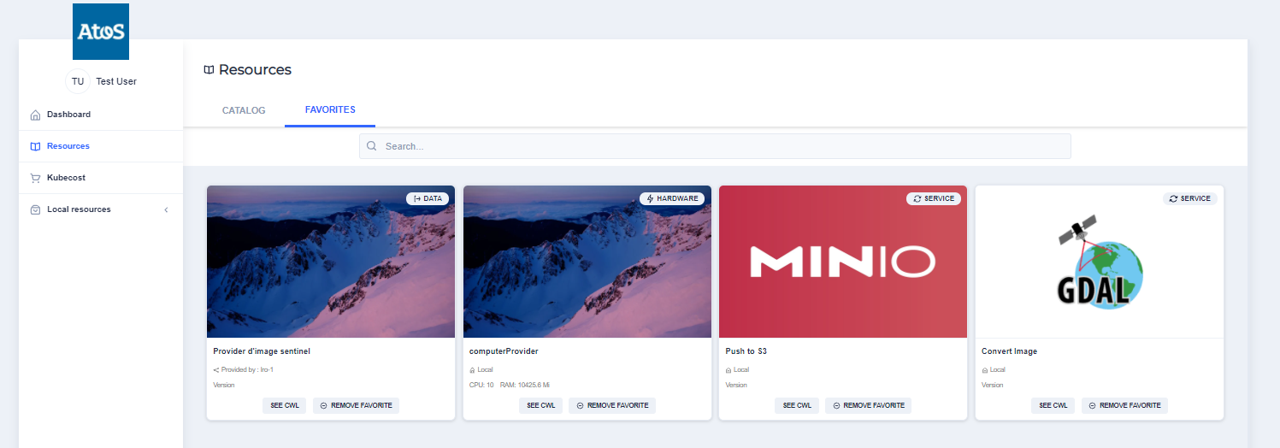 In my next screenshot I can see that as I have added the resources inside Resources screen, I can see these resources available for me. Now I can put them inside a workflow and would be able to execute the workflow.
In the Dashboard screen, in the WORKFLOWS panel, you can create your first workflow by clicking on the NEW WORKFLOW button on upper right corner.

You can can edit the workflow by clicking on the ‘pencil’ button at the end of the workflow name that has been created.
On the EDIT panel, you can drag your resources from the left RESOURCE PICKING space into your workflow creation space.
You can connect the resources one to each other based on your workflow’s logic.

Once your workflow defined, you can use the EXECUTE tab in order to plan the execution of your workflow.

Do not forget tu put the right parameters for your resources inside the workflow execution interface. In our case its a date boudry during which stelite images would be choosen for the treatement.
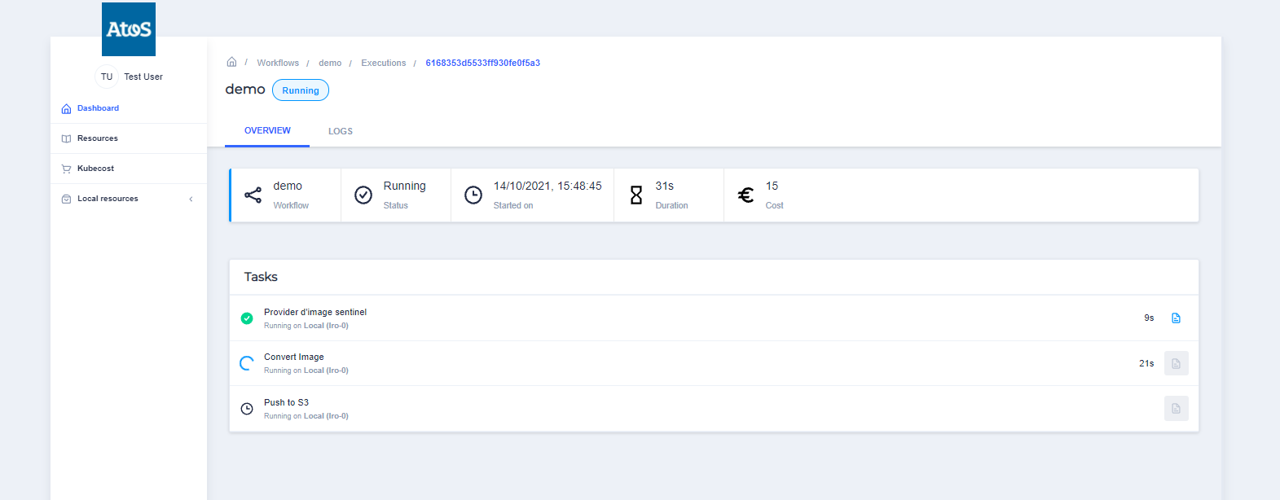
You can see the workflow execution inside the EXECUTIONS tab :
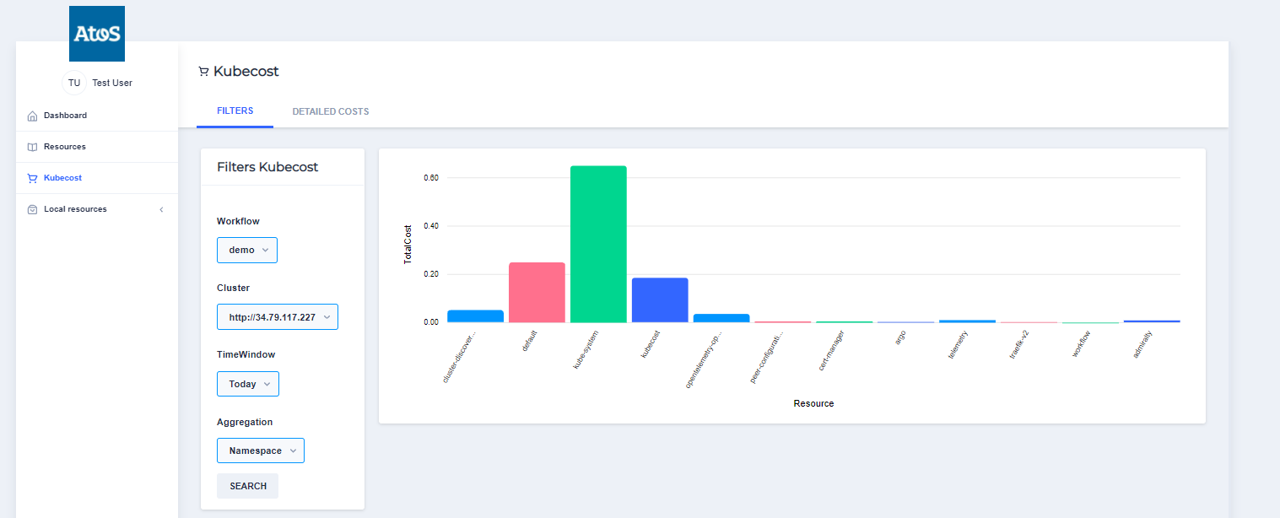
KUBECOST
On the left menu panel, you can click on the KUBECOST link in order to see the consumption costs of your cluster.
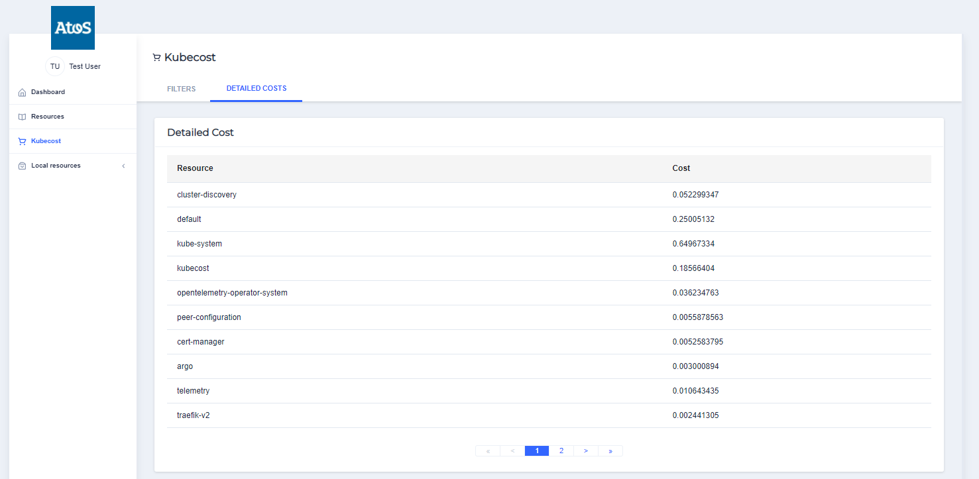
With its details :
Once the workflow has terminated, you can check out inside the storage provider in order to get the results of your worflow exection.

Provider configuration

Use TLS to communicate with the application
By default, the application is reachable using the HTTP protocol,
with no additional security. A layer of security can be added. This insure, for
example, that the Admiralty token are not sniffed on the network while sent from a compute provider to
another.
In order to add TLS, you need a domain name.
From that point there are two options:
- Use a static traefik public IP
- Use the public IP selected during the installation process.
Use a dynamic traefic IP
If you want to use a dynamic IP, you first have to install the application.
git clone https://gitlab.com/o-cloud/helm-charts.git
cd helm-charts
sh install.sh
When the installation is done, get the public IP (EXTERNAL-IP in the command below)
kubectl get services -n traefik-v2
NAME      TYPE           CLUSTER-IP    EXTERNAL-IP     PORT(S)                                                                                                                AGE
traefik   LoadBalancer   10.0.45.225   XX.XX.186.229   4001:32259/TCP,4002:31877/TCP,4003:31938/TCP,4004:31558/TCP,4005:30214/TCP,9001:31414/TCP,80:31389/TCP,443:30644/TCP   103m
The EXTERNAL-IP, here, is XX.XX.186.229.
Set the domain or subdomain you want to use to point to that IP.
You might want to choose one subdomain for the dashboard and one for the admin
You can create a new entry in the zone dns of your domain provider.
Create an A record that points toward the subdomain you chose.
Once the dns record is ready, set the TLS part of the tls.values.yaml file.
Set the following variables:
tls:
  # If defined, let's encrypt will be used to generate valid certificates using HTTP01 challenge
  letsEncrypt:
      # Email needed to get notification about TLS certificate expiration. But, not used, thanks to cert manager who renew the cert.
    email: "myemail@workplace.com"

  # The "main" certificate will be used to all the exposed microservices (except admin)
  main:
    hosts:
      - "www.mysudomain.mydomain.com"

  # The "admin" certificate will be used to the admin microservice
  admin:
    hosts:
      - "www.myadminsubdomain.mydomain.com"
Once this is done, you can upgrade the helm release, using the
tls.values.yaml file to override the values.yaml variables
helm upgrade irstb -f tls.values.yaml
Check if the TLS cerficates are set properly
kubectl get certificates
NAME               READY   SECRET            AGE
irtsb-admin-cert   True    irtsb-admin-tls   157m
irtsb-main-cert    True    irtsb-main-tls    157m
Check if the Let’s encrypt challenge has failed.
kubectl logs deployment.apps/cert-manager -n cert-manager
Use a static traefic IP
You can choose to use a static public IP for traefik.
In that case, you have to set the static IP you want to use in the kubernetes engine provider you use.
Then, create two subdomains (one for the host and one for the admin panel) that point toward that IP.
Set in the tsl.values.yaml file the subdomains for the host and the admin:
tls:
  # If defined, let's encrypt will be used to generate valid certificates using HTTP01 challenge
  letsEncrypt:
      # Email needed to get notification about TLS certificate expiration. But, not used, thanks to cert manager who renew the cert.
    email: "myemail@workplace.com"

  # The "main" certificate will be used to all the exposed microservices (except admin)
  main:
    hosts:
      - "www.mysudomain.mydomain.com"

  # The "admin" certificate will be used to the admin microservice
  admin:
    hosts:
      - "www.myadminsubdomain.mydomain.com"
You can then install the application overriding the default values in the values.yaml file:
helm install irtsb . -f tls.values.yam
Without let’s encrypt
You can decide to use TLS but not use let’s encrypt.
In this case, you have to set the host and admin domain in the tls.values.yaml:
  # The "main" certificate will be used to all the exposed microservices (except admin)
  main:
    hosts:
      - "www.mysudomain.mydomain.com"

  # The "admin" certificate will be used to the admin microservice
  admin:
    hosts:
      - "www.myadminsubdomain.mydomain.com"
and leave commented the let’s encrypt part.
tls:
  # If defined, let's encrypt will be used to generate valid certificates using HTTP01 challenge
  #  letsEncrypt:
      # Email needed to get notification about TLS certificate expiration. But, not used, thanks to cert manager who renew the cert.
      #  email: "myemail@workplace.com"
Furthermore, you have to add the domains in the /etc/hosts/ file for the domains to be reachable:
$ cat /etc/hosts

##
# Host Database
#
# localhost is used to configure the loopback interface
# when the system is booting.  Do not change this entry.
##
127.0.0.1	localhost
...
XX.XX.XX.XX mysubdomain.mydomain.com
NOTE that the domains you will be using won’t have a valid certificate. There are potential risks doing that. Furthermore, the compute provider (and probably other microservices) won’t be able to reach some endpoints due to the validity of the certificate. You can however bypass that behavior by acceting unvalid certificates. That is beyond the scope of this installation guide.

